1995-10-28
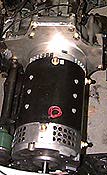
Motor Installation
 Motor w/soda can for reference
10/24/95
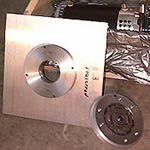
Motor, adapter plate (w/spacers), coupling The coupling uses the old clutch disk, which works nicely since we know it already matches the transmission shaft, plus the clutch disk has small springs for absorbing jolts from the road. The coupling is made of stainless steel, while the rest of the mounting pieces are thick aluminum.
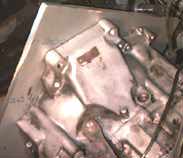
Adapter plate fitted to housing for marking The adapter plate needs to be drilled and cut to couple with the bell housing. Bob Batson lent me an alignment device so the adapter plate can be put into place against the housing and marked for drilling. I'll mark one of the 9/16" inch holes, verify that it works, then mark off the rest and get them drilled. I'm being careful since I don't have the equipment to drill this and will be shuttling back and forth to a machine shop. Once this is done I can mark the outline of the housing on the adapter plate and cut off the excess metal.
 Here is a rough sketch of how the new motor will attach to the transmission. I took the liberty and gave you x-ray vision so you can see a cross-sectional view. The coupling is first taken apart, one half attached to the DC motor. This is slid through the adapter plate where the other half of the coupling is mated to it and secured. Finally the whole assembly is mated to the transmission: the coupling with the transmission drive shaft and the adapter plate bolted in place. A motor mounting bracket will need to be fabricated to hold the other end of the motor up so all of its weight isn't being shoulder by the bell housing.
Time passes...
10/28/95 Decided to get out my little electric jigsaw to trim off the excess metal on the plate after scribing the outline: big mistake. One half inch aluminum is tougher than it looks. Two days later and I got it cut and deburred (I'm still shaking like Wile E. Coyote after taking earthquake pills). Backed the car out of the garage, put my come-along on the ceiling I-Beam (every garage needs a nice big I-Beam!), got out the nylon straps and rigged them up around the motor (remember it weights almost 150 pounds now) which has all of the adapters and couplings attached, and slowly ratcheted this heavy baby up high enough that I can roll the car in underneath it. About the same amount of wiggling to get this motor in as to get the old gas engine out.
Next: More Guts! |
|
© Copyright 1995-2002 Jerry Halstead